Creating Public and Resource Calendars in Salesforce.com

Want to learn more about Calendaring Options?
Our 3-Day Administration course covers a variety of topics including salesforce.com configuration, customization, automation, and administration.
Creating Public and Resource Calendars in Salesforce.com
Salesforce has great Calendaring features built in. You can manage your individual calendar and share it with your team and co-workers. Set-up public and resource calendars for your organization as well.
First, navigate to our Public and Resource Calendars:
Your name > Setup > App Setup > Customize > Activities > Public Calendars and Resources
You can also easily find this by typing in “public calendars” into your quick find.
Public calendars lets others know what is going on in the company. This includes project schedules, department events, or other company happenings.
Resource calendars let others know what conference rooms, projectors, or other company resources utilized.
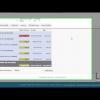
Both are set-up in the same manner. Click ‘new.’ Specify the calendar name and whether or not it is active. Then you can start sharing. Notice that you have different levels of sharing access for different people. Remember you want to start-off broadly, by giving individuals less access, and then give additional permissions to only certain individuals.
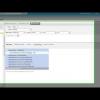
Example: add a new sharing rule. We have a Group for our entire organization and we can add this group or we can go to “Roles and Subordinates” and select the highest role, which is our CEO, and then have “Show Details” as our access. This opens up access for everyone in our organization to SEE this calendar. We can manage it ourselves, or we can specify another calendar admin by creating a new sharing rule, selecting a user, group, role, etc, and giving them full access. You can make all kinds of dynamic sharing rules with variations.
To manage the calendar, go back to the homepage and click a calendar view. At the top under Calendar for yourself, you can find “Change” click it to pull up the dialog box, select public calendars and resources and choose a calendar, you can then start adding dates for your public calendars in this screen.
Resources can be added to a calendar, by going into any event and adding the resource in the “Invite Others” section.
Remember, end users will need to click “change” and select the calendar they wish to view in a similar fashion.
- Founder, Fibersense Technologies
- Founder, Skylight Navigation


